 I have a few tips some of you may find useful if you want to convert your pretty vintage plates into pretty china tiles and focals
 Now, most how to websites offer the hammer method. I beg you to leave the hammer to the nails and get some wheel nippers! There are some good deals on ebay and you can find them in any hobby store. I purchased my first pair at Michaels years ago. Lowes and Home Depot (and other national chain hardware stores) do not carry the wheel nippers, but they do offer other kinds of tile nippers that a more advanced artist may find useful.
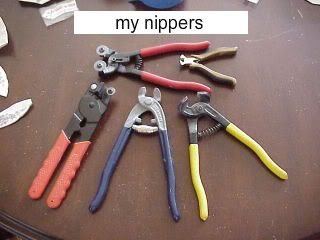
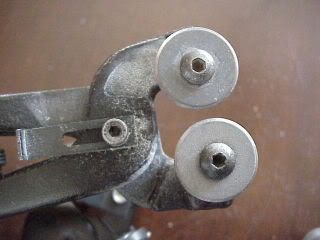
I have five different kinds of nippers; each provides a specific use. But for beginners, start with the wheel nippers, they can accommodate most tasks.
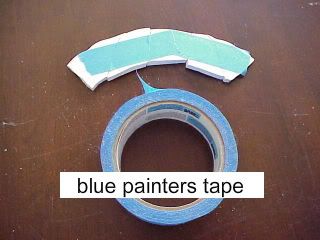
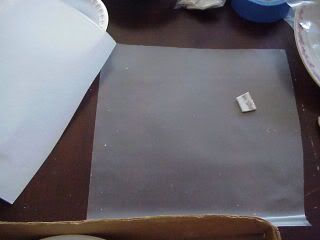
Now before you being nipping, get organized. It is helpful to have contact paper handy. I like to use Mosaic Mount; yes, it's more expensive but the benefits are well worth it to me.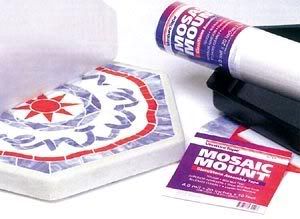
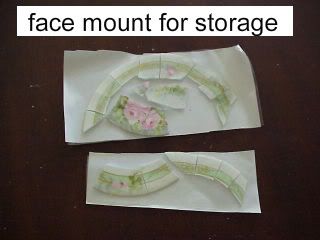
Mosaic mount does not leave any residue on your nipped tiles and it does not dry out. I have some patters on Mosaic Mount that have been there for over 3 years at least! (Now, just between us, in an emergency situation, I have been known to use the blue painters tape; don't tell anyone ok!? ;-p)

You can find Mosaic Mount in rolls or sheet. I buy the rolls; more cost effective and more flexible for varying size layouts. It also makes creating stepping stones a breeze! (I will go into detail about creating beautiful stepping stones in the near future).
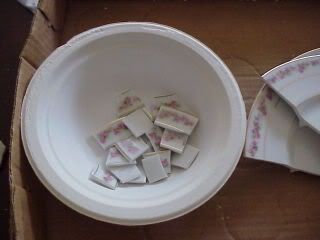
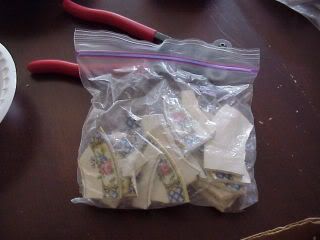
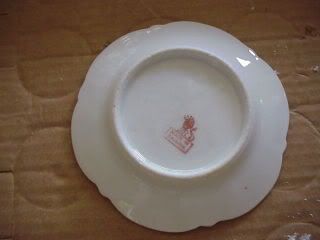
Have some plastic zip lock bags or paper bowls handy to keep your tiles organized as you go. (I keep 3 large gallon bags handy, one for the bottom rims that have any floral design on them…don’t ask my why...I dunno lol!; another for the white pieces for filler, and a third to collect any hallmarks on the bottom.)
HOW TO NIP STRAIGHT TILES:
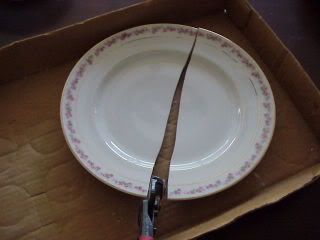
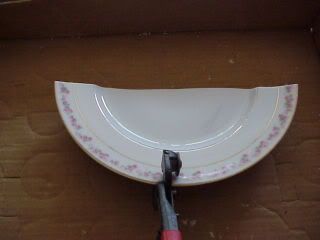
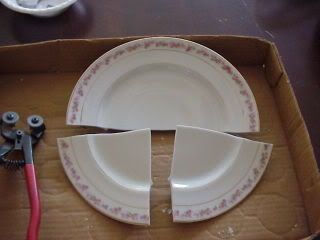
First nip to divide the plate in half keep your nippers as straight as you can. Next nip one of the halfs into half; that will be your starting quarter.
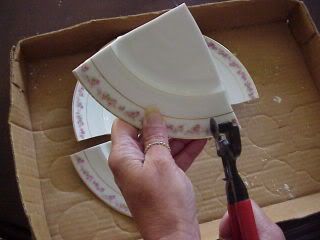
Take one of the quarters and start nipping your straight tile pieces. Keep your nips as straight as you can. Keep your quarters in order, so that you can place each tile onto the mosaic mount.
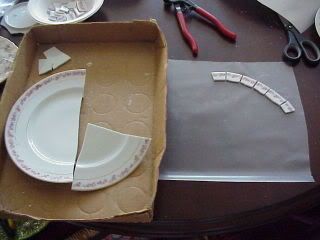
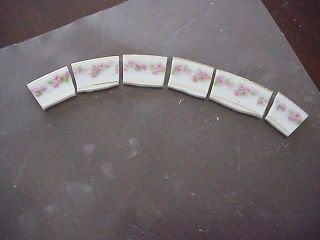
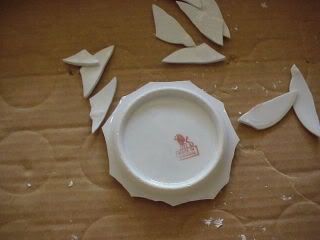
You can place each tile face down or face up (back of tile onto the adhesive). This process is fairly simple and you be a pro at it in no time at all! Do be sure to save any hallmarks and flat white center pieces for future use.
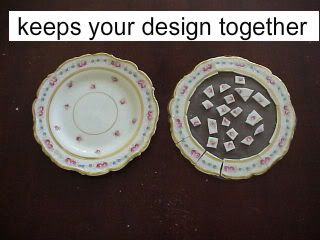
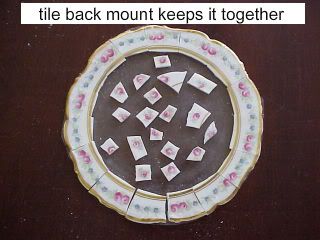
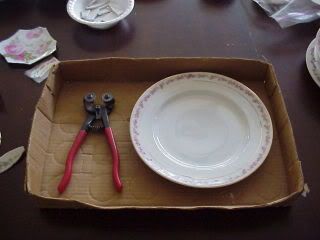
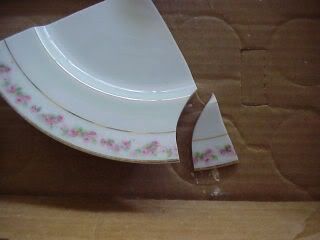
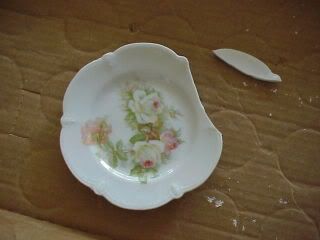
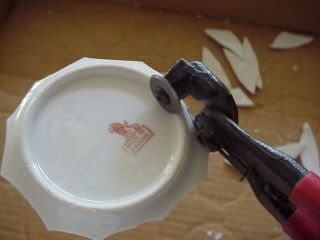
HOW TO NIP OUT A FOCAL
Focals are the center design of the plate. To nip them out successfully, you will have to get around the bottom rim of the plate. The bottom rim can be a bugga!
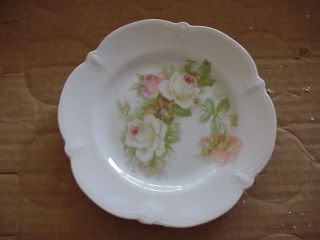
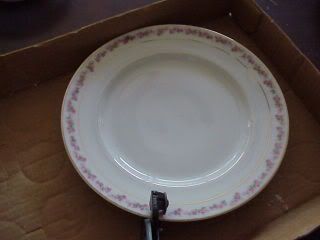
For this example, I'm using smaller vintage plate that is about 4" in diameter. Since the center is the only design, I need not worry about rim pieces; but I will still save them for future use.
Your first nip will be an angled nip. Try to keep the nippers parallel to the rim.
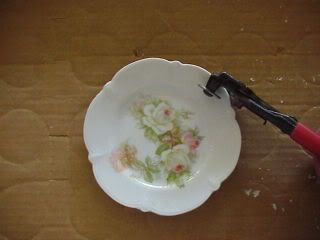
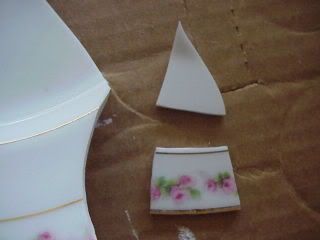
After the first nip, work your way to the outside edge of the bottom rim. Once there, continue to nip all the way around the plate.
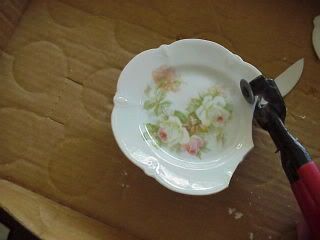
Turn the center over and place your nipper against the inside of the rim. Use the inside of the rim as your guide as you nip around the center.
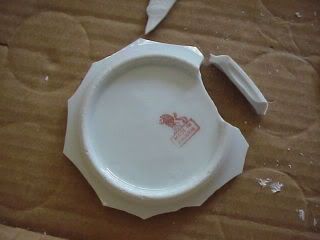
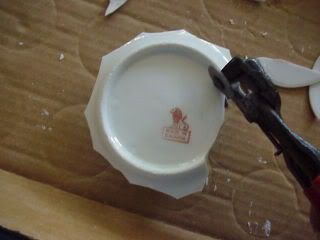
Then, keeping the same angle, nip around the inside of the rim.
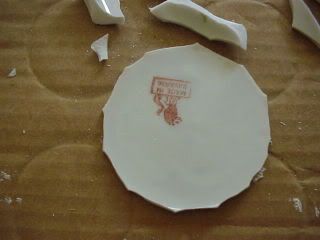
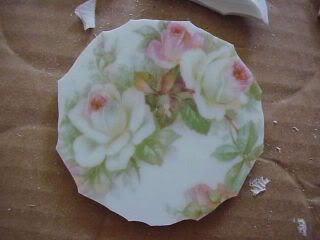
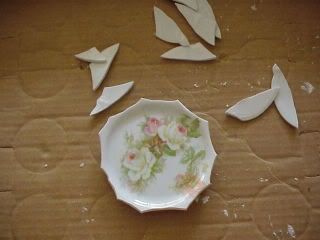
Voila! You have your focal!
To achieve a smooth circle, you can nip down the more pointed areas, or use a dremel to smooth them out. I usually just nip. The face rims can easily be nipped into useable pieces. (These outer rim pieces are great to use on the edge of a table, gives a cleaner finish.)
This method works most of the time for me. Once in a while the plate doesn’t want to cooperate, c’est la vie!
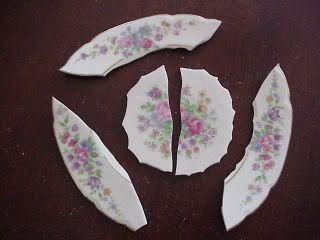
Occasionally you will have a plate with both a beautiful design around the face rim as well as the center. Unfortunately, you will have to decide which you want more. The example shown took two plates total; once plate for the focal, one for the face rim design.
With a little practice, you will have no problem learning how to use your wheel nippers for the best results. Just remember, you are creating a mosaic, there are no wrong nips!
Please feel free to post your comments or questions on here, or email me anytime!
Please note, my content is copyright with exclusive rights. Please do not copy my content (text, photographs, illustrations) into any printed form or any form of publication.
Happy Nippin!!

25 comments:
Hey Tina; I am a new Mosaic newbee. I am learning so much from your very helpful tutorials. I don't have a roller pair of nips, just a plain set,now I was wondering how every one did their mosaic's they way you did. And know I know.... how excited I am right now... I am going to be reading lots more of your tutorials.... thank you so much for sharing..... I am going to go and find my wheel nips... smiling huge........
Hugs;
Alaura
OOH.
The more i look the harder this mosaic wrok looks. =0(
How much does it cost to get started with simple tools?
thanks again
barbara jean
Barb, not really that much. If you already have the plates and the base, the nippers are about $15-20.00 (and they last forever), the grout (in small quantities) is under $10.00. And the so is the thinset.Even with the smaller sizes you can make more than one if you are doing a side table top or a tray. I'd guess about 3-4 20X16" trays. Hope that helps!
Tina
This tutorial is excellent!
What a FANTASTIC tutorial!! Thankyou so much for sharing this, can't wait to get started on my very own mosaic project : )
Sheryn xox
Thank you so much for all the wonderful instructions and photos to go along with it! Sue
Thanx so much for this information I have always wanted to try China Mosaics!
friendsfauxever.com
I'll be back reading more tutorials!
Amazingly well illustrated and clear. Thank You! I love your work.
Dear Tina
I am also a beginner on Mosaic, full of passion and excitement. I'm learning everything on my own, looking for good tips and tutorials all over the web. I must thank you warmly for your kindness to share your knowledge so clearly and generosly.
Margalit - Israel
dear Tina
Thank you so much for your wonderful blog!!!!!Where and you usually select a plates.Which are is better? Small? Big? With big pictures or small?
Thank you so much!
Olga
Tina,
I love your website. It's the best. Can I ask you, how do you keep the "gold" on the dishes when you grout over it? My dishes that have gold on them, seem to lose a lot of the gold when I grout.
Rose
Hi Tina,
Is it possible to replace tiles on a piece after it has cured and if so, how? Thanks!
Tina (I'm a Tina too!)
Very excited to try this, I have had a couple of pairs of nippers now for quite sometime and just dug them out a few days ago and have a couple pieces of vintage china calling my name...I will let you know how things go...Thanks so much for the great info...
Oh my gosh - so much wonderful information. Thank you!! So many artists will not share information, or will only give you a portion of it. You have no idea (well, you probably do!) how may projects I started only to become frustrated and asked for the simplest of help or an answer, only to be told "you will need to work out your own technique, it's what we call our trade secret!" When I moved a few years ago I tossed a couple of projects because - well, I've been saving both tons of china and tiles! Now on to a good, better, pair of nippers, and get started again!
Thank you so much for your inspiration!
Blessings,
Donna
Thanks for the tut, it was wonderfully helpful. I have some dishes I've been saving for this, but been afraid to try. Now I can;)
Thank you for sharing... Very helpful!
Thanks for this excellent tutorial! I've been breaking a lot of china, trying to figure out how to remove those stupid plate ridges on the back and now I know. I will be perusing your other tutorials--I appreciate your willingness to share your expertise!
Thank you so much for all the info...the step by step instructions make it look so easy and so beautiful
I have a question where can we find the pendants that will hold the broken pieces? I have a small tea store where I sell tea pots tea cups and loose leaf teas ...I recently had a bunch of expensive tea cups from Hungary the famous Herend (each tea cup is $150.00 small tea cup saucer is $110.00 I was devastated till now fortunately I kept the broken pieces. I was so excited when I saw your work...not only can I make jewelry but mosaic tea trays and other items.. thank you soooooo much... my website is www.RooibosAndFruitTeas.com
If anyone has any other ideas please feel free to email me. vpestana@aol.com
I want to do this, love your blogs. Will I need both Nippers and Dremel? If so, do you suggest a certain brand?
I have never tried this, please give me a list of what all I need to start a project. I have nothing.
It sounds scary, but I really want to do Mosaic.
Feebie
I appreciate the great tutorial, too! I've been looking for instructions on how to cut a plate keeping both the center focal and rim design. I was hoping there was a top secret technique that I didn't know about but, sadly, I now know that have to choose one or the other. :( Just like many things in life, I can't have my cake and eat it, too. Oh, well.
Thanks again,
Lynn
I am using wheeled nippers to cut plates. I don't see anything is bent on them but they are not closing enough to go around a piece of glass and barely can nip a china plate. Are the wheels supposed to be parallel to each others, mine are offset? The screws and wheels do not appear bent but the first plates I nipped where more of a stoneware, thicker plate and I don't know if I messed up the nippers some how?
I am finding that my wheel nippers have too big an opening when trying to nip thinner vintage plates. Do you know if they make nippers that almost close completely when nipping? Maybe even adjustable nippers that you know of? Thanks for the help.
thank you for this great blog entry on cutting porcelain plates. I just went to a broken plate jewelry workshop today and the facilitator was not that experienced... your explanation of the various cutters makes it very clear how to use them. I can see from the photos that you create very clean cuts that don't need that much work to even them out.
Thanks, your tutorial is great. I am recycling a table for my brother and I have a photo in-lay in the center, but I felt that I needed a little "wow" factor to go with it and now I know what to add and even better I have a resource on how to do it. Thank you so much. People like you that share your talents with other people are amazing!
Post a Comment