Showing posts with label shabby chic. Show all posts

6.3.10

AQUA PAINT TREATMENT ~ HOW TO

The aqua treatment on this urn fairly simple. There are 3 main steps, with an optional 4th:

Step 1: Base coat of Kilz original sealer/primer spray paint (Lowes/Home Depot). Let dry completely before moving on to Step 2.

Step 2: One coat of Design Master Robin's Egg #792 spray paint (Michaels). Let dry completely before moving on to Step 3.

Step 3: A mixture of uncolored glaze (Lowes) with a bit of American Accents, Blossom White paint (Home Depot). I use the glazing to tone down the Robin's Egg #792, as the color comes out very bright. If you like it that way, you can skip this step.

The glazing process is the "make or break" step. Brush on your glazing, then wipe it off. If you take off too much, you can always apply more and wipe some off.

21.2.10

HOW TO MAKE A STYROFOAM BASE WREATH

I have received a few inquiries about how I create my wreaths. So I thought it would be a good idea to add it to my "How To" library of tutorials.

You can use any material that you can safely glue onto the ribbon covered base. Seashell and faux flowers are quite popular. Other items are fabric flowers, buttons, rhinestones, jewelry, faux pearls, nuts, candy, just to name a few.

Keep in mind that if you want to use heavier materials use a smaller wreath base or use a stronger adhesive. If I were to create a larger seashell wreath over 15" I would use a much strong adhesive, such as E6000 or gorilla glue.

There are many shapes and sizes that are available from hobby/craft stores as well as online craft supply stores.


2.2.10

HOW TO MAKE A SEASHELL FRAME

Basic Supplies:
Frame
Seashells
~ assorted types and sizes
Focal ~ in this project I used a Star fish
Adhesive ~ you can use glue stick or any adhesive that will dry clear. For this project I used industrial strength E6000. You can find it online and at most hobby or hardware stores.
Plastic disposable gloves
Primer ~ Spray or brush on
Paint ~ Spray or bush on
Dust Mask

Note: If using E6000 industrial adhesive, be sure your work area is well ventilated.

If you will not be painting your frame, just give it a light sanding to give the glue something to "grab" onto.

Choosing a frame ~ This works for any type of frame, be it for photos, mirror, or black/chalk board, as long as you have ample room for the shells. I look for frames with ample recessed areas for a more polished look.

5.8.09

HOW TO GROUT YOUR MOSAIC SURFACE

Now that you have adhered your tiles to your mosaic base, it is time to grout your piece. Before you begin I'd like to offer some helpful hints that will make your grouting experience as well as the clean up a more satisifying experience.

One important factor to consider ~ once you start the grouting, you must see it though the finish. Grout is much more difficult to remove the more it cures.

3.8.09

BROKEN CHINA MOSAIC (PIQUE ASSIETTE) ~ BASIC STEPS

When I first started creating broken china mosaics, a.k.a. Pique Assiette, there was very little information available. I had many questions and very few answers or helpful hints to reference.

I've created this How To to share some helpful hints and instructions that I learned through trial and error.


29.7.09

5 MINUTE CENTERPIECE ~ VINTAGE POSY UNDER GLASS

In my first Tablescape Thursday post, hosted by Susan at Between Naps on the Porch, I received loads of compliments and inquiries on how I did my centerpiece.

This is very simple and has a great impact. Truth be told, I threw this together in 5 minutes. It is very easy and you can use whatever you have available.
Here are a couple of photos of the original that I used in my tablescape...

23.6.09

MOSAIC STYLE ~ PIQUE ASSIETTE DEFINED

When most people hear the term "pique assiette mosaic" they automatically think of a mosaic created from broken china.

I'd like clarify this particular form of mosaic art. The following definition best describes this wonderful art form.


Pique Assiette - a french term meaning "stolen from plate." Pieces of broken china, pottery, glass, buttons, figurines, and jewelry are cemented onto a base to create a new surface.

1.6.09

SAFETY AN IMPORTANT FIRST STEP!

Safety first is an absolute must! Since most statistic show that the majority of injuries occur in the home. I cannot stress enough how important it is that you should take the extra steps to insure your safety as well as your health.

When you are nipping plates and glass tiles, painting, gluing, using adhesives, mixing grout, you are exposing yourself to potential injury, infection, or illness. Appropriate protective clothing and equipment are essential.
Ten inch plate1

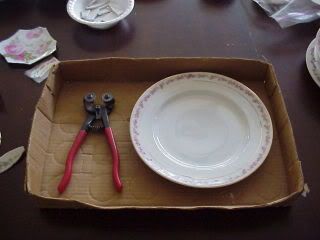
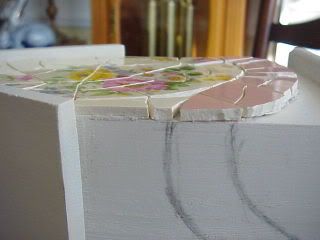
Glass and tile shards tend to fly off in all directions. Most of that can be controlled by using a tray to nip plates over. I use a cardboard tray (found in most garden centers). This way most of the tiny shards will collect in the cardboard tray, making it easier to toss into the trash bin.


Photobucket

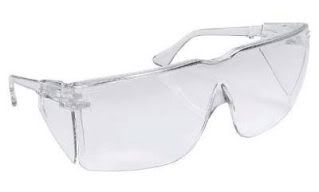
Protect your eyes! The splinters and small pieces from plates and glass tiles can be extremely sharp and very painful. Protective eyewear is a must to protect your eyes, as these splinters can fly towards your face.


Photobucket
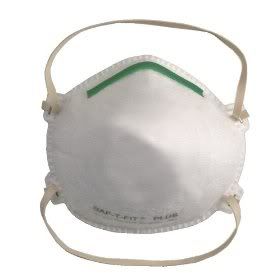
Mouth and nose filter masks prevent dust and fumes form entering your lungs. Without this protection you risk infection or potential illness.

Photobucket Photobucket
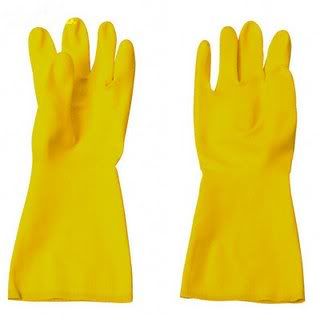
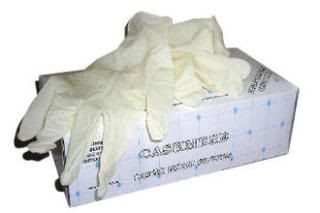
Rubber gloves or surgical gloves should be worn at all times when handling the tiles, adhesive, mortar, thinset, grout, colorants, paints, and when sanding. Some of the adhesive and grout mixtures are acidic and can irritate your hands. Splinters from broken tiles and glass will also be a concern. Be sure to wear long a long sleeve shirt.


Surgical gloves are often better for more intricate work such as laying china and glass tiles. They are tighter fitting and allow you to handle smaller pieces easier. They are generally made of latex with or without a powder coating inside. These are cheap and best of all, disposable.


Keep your creative process a safe one by applying these simple safety measures.

Stay Well and Happy!

Ciao,


Please note, my content is copyright with exclusive rights. Please do not copy my content (text, photographs, illustrations) into any printed form or any form of publication.


FOUNTAIN MAKEOVER

I got this fountain a couple of years ago. It is made of three pieces, base, bowl, and crown. Since I didn’t want an electrical cord running across the terrace, I repurposed it into a beautiful planter.
 
The original color was limestone. It was spray painted with faux stone paint; (not by me lol) which was made for indoor use. It didn’t fair well and was peeling badly and by this spring it looked just awful.

MOSAIC METHODS DEFINED - DIRECT, INDIRECT, AND (MY) DIRECT PRESS

Generally, there are two basic methods to creating a mosaic piece: direct method and the indirect method. In working with vintage china and the varying types of bases.

I have also included a brief description of my Direct Press Method.

DIRECT METHOD

Photobucket Photobucket

The direct method is where the mosaic tile pieces are adhered face up, one by one, directly onto the surface you are going to mosaic (such as table tops, trays, birdhouses, etc.).

29.5.09

HOW TO NIP CHINA TILES AND FOCALS

I have a few tips some of you may find useful if you want to convert your pretty vintage plates into pretty china tiles and focals

Now, most how to websites offer the hammer method. I beg you to leave the hammer to the nails and get some wheel nippers! There are some good deals on ebay and you can find them in any hobby store. I purchased my first pair at Michaels years ago. Lowes and Home Depot (and other national chain hardware stores) do not carry the wheel nippers, but they do offer other kinds of tile nippers that a more advanced artist may find useful.

28.5.09

CREATING A SMOOTH & LEVEL MOSAIC SURFACE USING DIRECT PRESS METHOD

It is universally acknowledged that mosaic is one art form that people are more inclined to touch than any other. We are drawn to it, we want to run our hands along it's smooth cool surface. There is something calming and sensual about it.

Your hands are the best judge in determining whether it is a well crafted, functional, quality mosaic. It can be very discouraging to to spend hours creating a piece (or spend your hard earned money purchasing a piece) only to watch people grimace as they touch it or quickly pull their hands away from it because of sharp or uneven areas of the surface.