
 Now that you have adhered your tiles to your mosaic base, it is time to grout your piece. Before you begin I'd like to offer some helpful hints that will make your grouting experience as well as the clean up a more satisifying experience.
One important factor to consider ~ once you start the grouting, you must see it though the finish. Grout is much more difficult to remove the more it cures.
No matter how careful you are, grouting is messy. Weather permitting, I grout out on the patio.
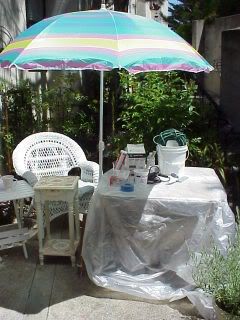
It is best to gather all the supplies you will need before you begin. Otherwise, you may be tracking wet grout throughout your home.
YOU WILL NEED
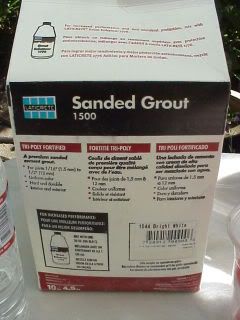
- Grout ~ sanded or unsanded (I prefer sanded) I use Laticrete. Lowes carries it.
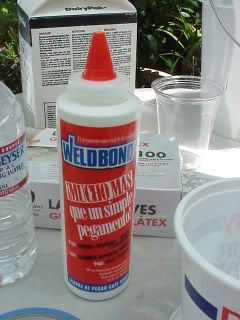
- Weldbond Adhesive ~ you can find this on ebay, more expensive smaller bottles are available at hardware or hobby stores. I add Weldbond to reinforce and strengthen the grout.
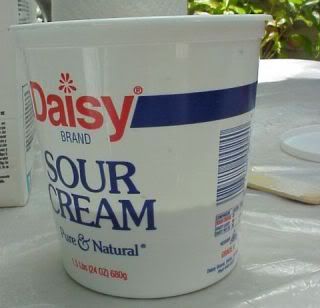
- Small container with a lid ~ used for mixing grout. I save 24oz Sour Cream containers. You may store unused grout for about a week. I try to use it within 72 hours.
- Wooden paint stick for mixing grout (thank you Lowes!)
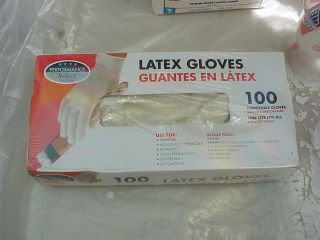
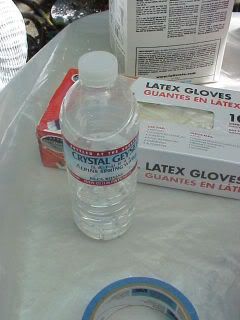
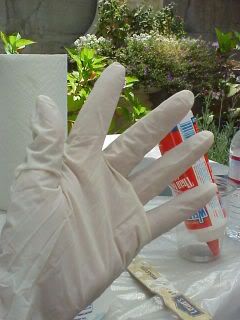
- Latex gloves to protect your hands. Grout will dry out and possible irratate your skin.
- Small float ~ you can substitute this with a stuff rubber spacula.
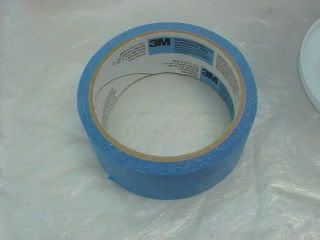
- Painters Tape
- Bottled water ~ in some areas, tap water can slightly discolor your grout. You only need a small amount of bottled water for mixing the grout.
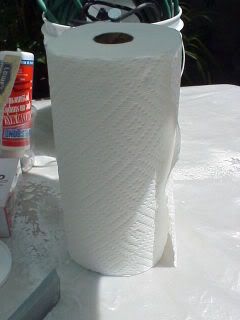
- Paper towels
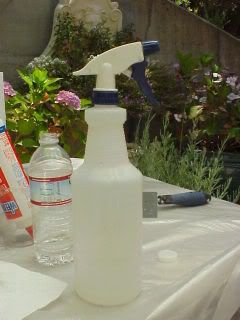
- Spray Bottle ~ you can use tap water to fill the spray bottle
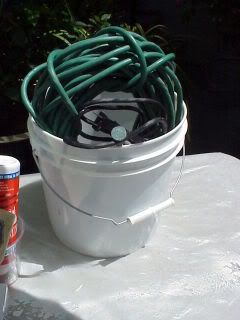
- Pail or bucket ~ fill with tap water
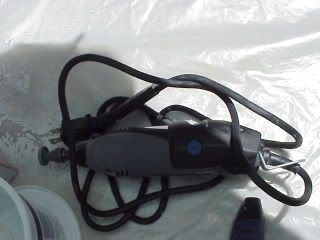
- Dremel
- Electrical extension cord; if your Dremel is cordless, this is not needed.
- Plastic sheets for covering table work surface or floor surface.

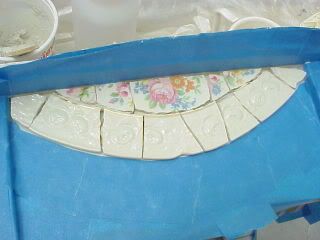
TAPING OFF
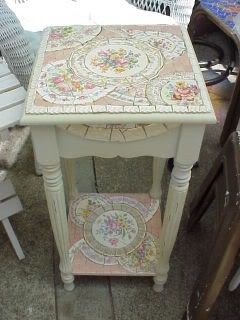
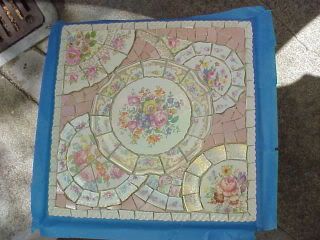
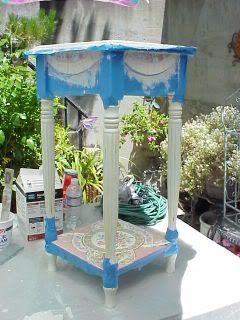
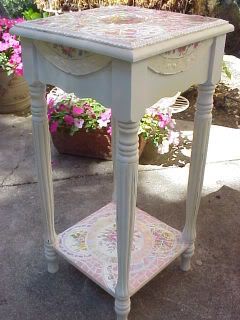
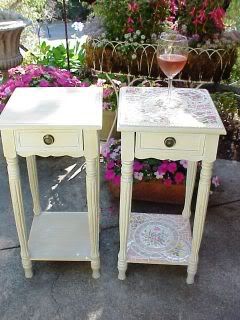
Before you mix your grout, prepare your mosaic base by taping off areas that you do not want the wet grout to come in contact with. Painter's Tape works best. For this piece, I have several areas that I will need to tape off; the top edge, the apron under the top an the bottom shelf and around the legs.

I used a plastic bag to cover the bottom shelf and secured it with tape. When you are grouting a multi-level piece, always grout starting at the top and work your way down.
MIXING GROUT
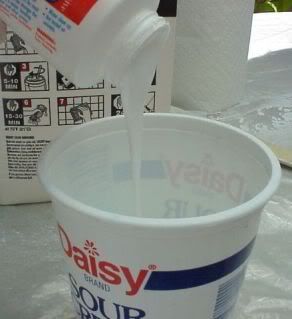
Be sure to put on your latex gloves! Pour approximately 1 cup of grout (about 1/3 of the container), 3 tablespoons of Weldbond adhesive, and 2 tsp of bottled water in your container.
As a general rule, it is always best to mix too much grout than not enough. You can always store the excess grout for a future project. Best way to store it is to moisten some paper towels and place it on top of the remaining grout and close it with the appropriate lid. You want seal it as air tight as possible. It should stay useable for about 10 days. After that, it will begin to harden.
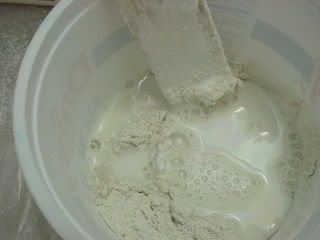
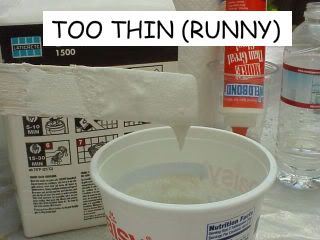
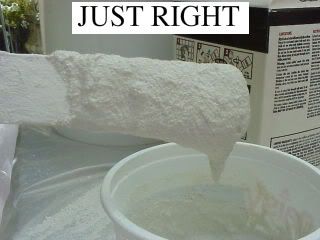
Using your wooden stick, mix grout thoroughly. It should be ever so slightly less than the consistency of peanut butter.
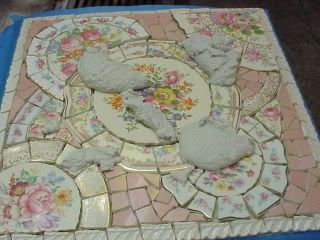
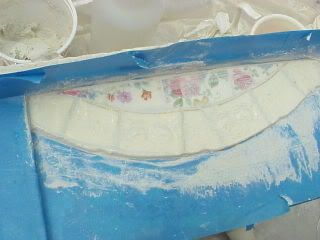
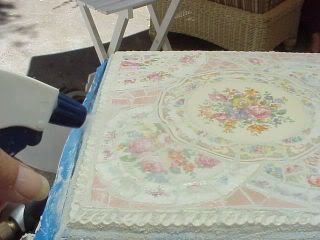
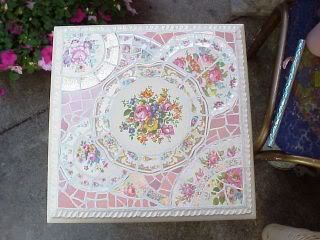
Once the mix is ready, spread the grout to thoroughly cover the top and around the edge. Be sure to push the grout into all the cracks and crevices of the surface and the edges.
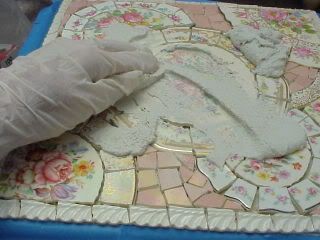
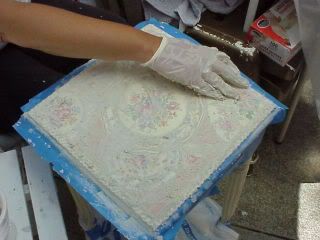
If you feel the grout becoming too thick, take your spray bottle had give the surface a light mist of water, then spread it around by hand. Once your have covered the surface thoroughly with the grout, use your float to lightly squeegee the surface to remove the excess grout.
Try not to press too hard. The goal is to keep the grout level to the china tiles.
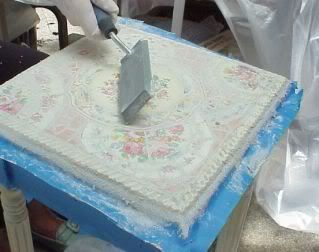
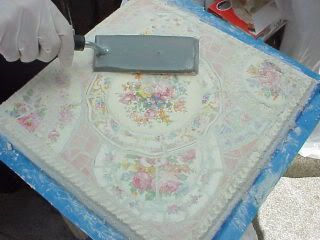
Angle the float and use a criss-cross motion to clean off excess grout. To prevent excess grout from building up on the float, you should continuously clean off the float by dipping it in a pail of water, wipe off any moisture with a paper towel, then continue to squeegee until the surface appears level.
SINGLE SURFACE ~ If you are grouting a single-level surface, allow the piece to rest for 10 minutes. Skip down to "CLEANING MOSAIC TILES"
MULTI-LEVEL SURFACES ~ If you are grouting a multi-level surface, apply the grout to the next area; be sure to work from the top, down. On this piece, the apron is grouted before the bottom shelf.
When grouting a multi-level surface, mist grouted surfaces every 15-20 minutes while you are working on other areas. Misting prevents the grout surface from drying to quickly. The more evenly the grout dries, the strong the bond. Once you have finished grouting all areas, it is time to clean the grout film off the mosaic tiles.
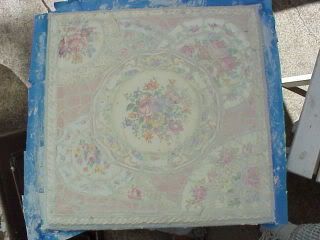
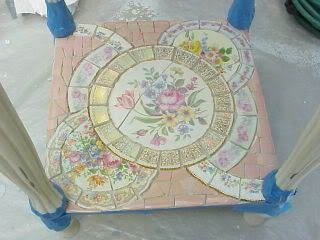
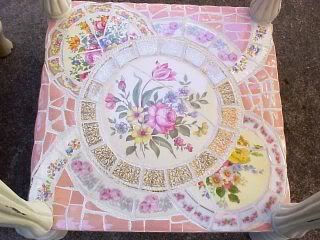
CLEANING MOSAIC TILES ~ You should see a filmy haze over the surface. Clean the haze off the tiles by lightly misting a small area and clean the surface of the tiles using the paper towel. Take care not to rub the paper towels into the grout lines.
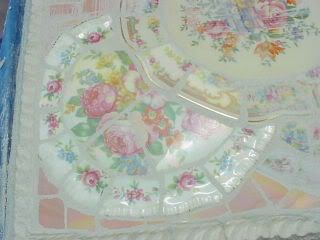
You will see the tile become more vibrant as you clean off the film. Continue cleaning until all the mosaic tiles until they are shiny and free of grout or haze. Again, take care not to remove grout lower than the height of the mosaic tiles.
To remove the Painters Tape, light spritz the edge with water, then score around the edge with a dull knife. I use an old butterknife and I work in sections. This enables you to remove the painters tape without removing too much grout from under the tiles.
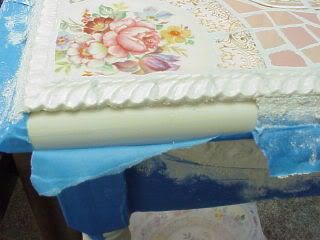
Should you inadvertently remove any grout, using the reserved grout, carefully replace the grout taking care not to get any wet grout on your surface. If you do, immediately wip it off with a damp paper towel.
Once you have cleaned off the film and any excess grout, lightly run your hand over the surface. Dremel any sharp corners you encounter. Take care not to dremel off any of the grout lines or too much of the tile. A quick light touch with the dremel is all that is required.
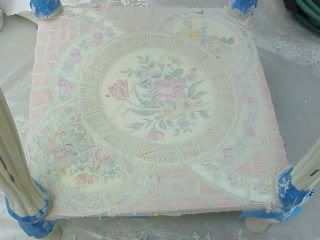
It is a good idea to mist the surfaces for 15-20 minutes for the first hour or two, so that the grout will dry more evenly.
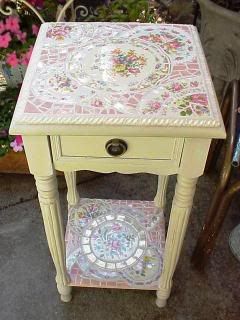
Let the piece cure for at least 72 hours before you seal the grout. Should you use the piece before you seal it, take care not to spill anything onto the surface as the grout is still vulnerable to stains. Once it is sealed, simply wipe any dirt or spills with a damp cloth.
Now is a good time to clean up your work area then sit back and enjoy your beautiful creation!

Remember, should you have any questions or comments, I am always happy to help!
Please note, my content is copyright with exclusive rights. Please do not copy my content (text, photographs, illustrations) into any printed form or any form of publication.
Happy Grouting!

25 comments:
Tina... I have watched many tutorials on differant subjects in my day but I can honestly say yours are the most detailed and easy to understand I've ever encountered...You have a gift in knowing what people need to know and how to explain it...and I can't believe you offer them at no charge...almost unheard of in this day and age...My girlfriend and I have been threatening to do this for a year now...Been saving our china and broken plates and cups, watching your tutorials, and now feeling like we can tackle this with minimal problem... Nice to know we can come screaming if we have any problems... My hats off to you my friend, xoxo~Kathy~ @ Sweet Up-North Mornings...
wow wow wow, I have seen lots of these and yours in the best!!! 50 stars!!!! And for your comment, I think you are so right! Thanks
Tina, thank you so much for such a well done tutorial. Truly. I have done a bit of mosaic and really had to "wing it." You have provided the best, easiest instructions yet. Your work is gorgeous. Thank you so much for sharing your talent. I am going to add you to our Dive Into Inspiration on our right-hand sidebar. Our Mermaids of the Lake is an online magazine for women and a blog, as well. We are all about Inspiration and your blog certainly qualifies!
Mermaid Debbie
Wow that is so neat! Makes me what to try it out!! Thanks for stopping by my blog also!
Oh I am so glad I found your blog. I love that little table. It is beautiful. I just made my first mosaic piece about a month ago. It looks nothing like your beautiful work, but I would love to try to do a table top like you have here. I just started with a tile for my first piece.
Lee Ann
Wow! This table is absolutely GORGEOUS! I just adore it so much. Just out of curiosity-if you were to put a price on this, what would that be? I have never done mosaic, and I doubt I'll ever try! But if I could make something this stunning, you can bet, I'd do it for the rest of my life! What a gift you have. Thank you for sharing.
Hi Tina,
I am working on four, very beginner mosaic hearts for my grandchildren with supplies I got from a garage sale a few years ago. I have followed your instructions and have a question about sealing this project. I have completed grouting. The sealer I have is by Plaid called Make-it Mosaics. Is this what I use to seal the grout? Do I apply it just to the grout and not the tiles? Do I need to wait a full 72 hours to seal after applying the grout? Do I even need to seal this little heart that will just hang on the wall?
Thank you so much for answering my questions. This is my first mosaic project.
Kindly, Lorraine
Hi Lorraine, your projects for your grandchildren sound adorable!
Sealing is best done when the grout has a chance to cure. I usually wait a week ha! But, for something smaller, 72 hours sounds just fine. I always seal as grout stains easily (very porous)and it protects the piece from dirt, moisture, and grapefruit spills, so yes I'd seal it.
I use One Step Grout Sealer made by Tile Guard. I buy it at Lowes or Home Depot.
You spray it on and let it soak into the grout (about 3 times). Then simply wipe off any residue on the tiles.
Any sealant made for grout will work. I haven't used the Plaid sealant but I'm sure it will do the job.
Hope that helps! Don't forget to post the photos!
Cheers!
Tina
Hi Tina,
I have one word...wow! Your mosaics are just beautiful. After reading all the 'How to's' you have me thinking maybe this is something I could do.
Thankyou for the inspiration, and for sharing your wonderful knowledge. I will be looking at china plates in a whole different way from now on.
Michelle
My neighbor gave me about 20 old plates for mosaics when she moved and I am dying to try this. I didn't have any ideas until I saw your work on pinterest and now I am captivated! This is beautiful! Thank you so much for posting and for sharing what you know! Very generous!
Hi Tina! What do you use to seal your pieces? I love your step-by-step instructions on how to level the different thicknesses of china pieces and your grouting techniques are great! Thank you so much.....;}
Hi Tina! What do you use to seal your pieces? Your step-by-step intructions are fabulous! Thank you so much.....;}
Hi Tina,
What lovely work you do. I just finished mosaicing a teapot and a birdhouse that I put a spout and handle on. They turned out good, except the grout cracked. I haven;t had this problem before, but my grout was not as thick, and the weather was HOT. Can I repair the fine line cracks? I see you haven't been on here since December, so hope all is well.
Thanks
Would this work with jet grouting as well?
A little off topic, but how do you cut those plate edges to such preciseness? I'm talking about what looks like the rim of the plate, cut to lay flat.
I have been trying to find some grout cleaning. This has been great. Thanks for this.
I am about to start a mosaic piece upon which I will be placing pearls and other jewelry. How do I grout without getting it all over those pieces??
I'm very interested in your process. I took mosaic classes at our local supplier and they did not tell us about the adding of weldbond to the grout - I found this very interesting and am assuming this is to harden the grout to outdoor elements. As well, when I made a large outdoor piece they told me not to use a clear coat protector over it (50/50 Elmer's glue and water). It's great to always get new information.
I am making a mosaic table out of broken china pieces -some thicker than others. Is there something I can seal it with - clear of course - that will level the surface so it is flat and even enough to place drinks on, etc?
Hi,
I have a question. I had someone take some broken china and make me something. It is a mirror that looks awful and is so heavy I can't even put it on the wall. Is there anyway that it can be undone completely? Is there a way to soak it in something to undo it?
Thanks. Robin
I have a birdbath that is made from china pieces and it is very pretty but the inside of it is so dirty~! I do not know what to do to get the grout to clean up nicely..everything is brown and green and I feel like throwing the whole thing in the garbage but it is made up of beautiful pink china so I need your help!
Did you seal the top? If so what product do you use?
hi, thanks for your awesome project and great tutorial. A few questions:
did you paint the table before or after you did the mosaics?
How did you get the edge pieces(the edges of the plate image?
What's a dremel???
Thanks, I'm now following you!
Post a Comment