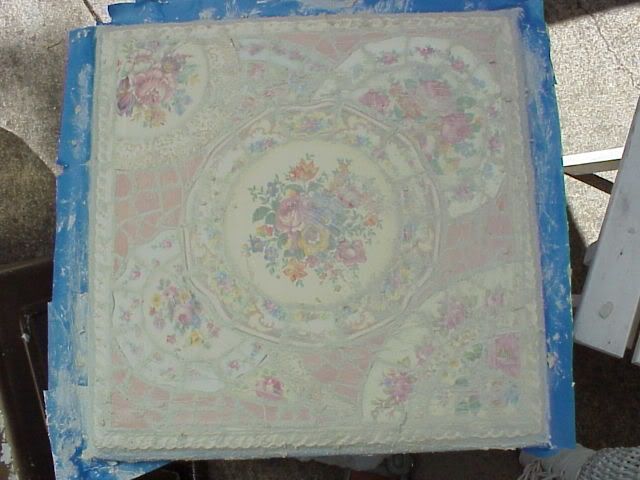
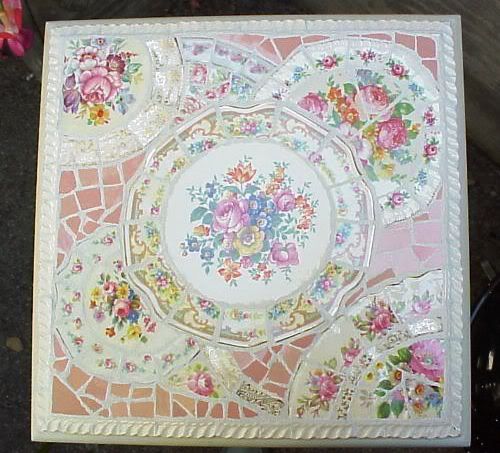
 When I first started creating broken china mosaics, a.k.a. Pique Assiette, there was very little information available. I had many questions and very few answers or helpful hints to reference.
I've created this How To to share some helpful hints and instructions that I learned through trial and error.
I am more than aware that art is a very subjective word. I just want to clarify my distinctions. My form is smooth, level, surfaces. I use professional grade grout and adhesives, I nip my own china and create my own focals. It is my intention to create pieces that will last through generations.
If you want to create heirloom pieces, here are a few key things to keep in mind:
FIRST: DO NOT SMASH YOUR PLATES WITH HAMMERS!! Leave the hammer to the nails.
SECOND: QUALITY MOSAICS REQUIRE TIME. Do not expect to finish a quality piece in a day or even a weekend. Mosaic is similar to knitting, it takes a bit of time for it to come out the way you want. Like knitting, it is possible to put the project down during the design stage (gluing/adhering tiles to the base) and return to it later. Unlike knitting, you can't take it everywhere you go.
THE BASICS STEPS:

 </>
</> 
 </>
</>1. Prep Your Mosaic Base ~ this is where you need to prime, seal, and paint the base you intend to mosaic. After the finish coat dries, it is time to mosaic. Do not apply a top coat in the area where you will put the mosaic. It is a good idea to apply a primer over the area to protect the grout from moisture. Some bases need only a little sanding to give the thinset/mortar something to grab onto.
2. Creating/Selecting Mosaic Tiles, Mosaic Focals, Laying Out Design ~ this is where you gather all of your nipped china tiles and focals, determine which method of you will use to create your Mosaic design and layout a design. You can always nip tiles as you go, but I encourage the basic china tiles and focals be laid out.
If you are using the direct or my direct press method, it is not necessary to layout all of your fill pieces; unless you are going to use different color fillers and want to be sure you are satisfied with the color combination. This is also your opportunity to see which tiles are the thickest. Do try to avoid extremes in the widths.
If you are using the indirect method, this is the time you will layout the design including the fill pieces before you transfer them face down into a mold or onto your contact paper or mosaic mount.
For the indirect methods, this is where you will pour the wet concrete into the mold, or press the prepared section onto the mortared base.
4. Prep for Grouting ~ after the thinset/mortar has set for at least 24 hours, it is time to tape off the base to protect the paint finish from the wet grout. Painters tape is most effective.
5. Grouting The Mosaic Base ~ Mix and apply the grout, let dry for 15-20 minutes then clean the film off the tiles and focals. Remove any painters tape. Now is the time to add any gout to gaps or spaces you may have missed. It is also a good time to file or dremel any sharp edges. Sharp edges must be tended to before you seal the piece.
6. Sealing the Mosaic Design ~ After the grout has cured (at least 72 hours) it is time to thoroughly seal the grout to protect it from stains and moisture. If you haven't filed or dremeled the sharp edges, be sure to do it before sealing.
7. Signing Your Mosaic ~ Always sign and date your creations. I use gold or silver paint pens. I usually sign the bottom of the pieces directly under the mosaic design.
There you have it. My 7 steps to creating a beautiful mosaic piece that will be cherished for years to come.
I've provided the following step-by-step detailed instruction that will guide you through the different process and help you achieve your desired results. Just click on the topic you need.
MOSAIC STYLE ~ PIQUE ASSIETTE DEFINED
MOSAIC METHODS ~ DIRECT, INDIRECT, MY DIRECT PRESS
HOW TO NIP CHINA TILES AND FOCALS
HOW TO CREATE A SMOOTH AND LEVEL MOSAIC SURFACE
SAFETY FIRST ~ AN IMPORTANT FIRST STEP
HOW TO GROUT YOUR MOSAIC SURFACE
Please feel free to save my blog as I will be adding more information as often as I can. For now, those are the most important instructions and help hints that will definitely help you get started. You can always find a list of my How To's at the top of the left margin of my blog page.
Please note, my content is copyright with exclusive rights. Please do not copy my content (text, photographs, illustrations) into any printed form or any form of publication.
If you have any questions, please feel free to email me anytime. I am more than happy to help!
Happy creating!


4 comments:
You do such amazing mosaics! They are so lively in color and I love how you designed them. Thanks for sharing how to make them.
Thank you for another amazing tutorial!! I am needing to go out and purchase some cutter tools to get started on my table. Thought DH has a few at our house in NM but they weren't there so...
You really have a gift for designing such lovely mosaics!!
blessings
mary
I love this, I've never seen this before! I MUST MUST MUST do this for my baby girls new bedroom! thanks for taking the time to write about it... I'll be watching your blog from now on!
I have another granddaughter on the way, and some beautiful odds and ends of china! THANK YOU for sharing your tips and experience!!!!
Post a Comment