 In my first Tablescape Thursday post, hosted by Susan at Between Naps on the Porch, I received loads of compliments and inquiries on how I did my centerpiece.
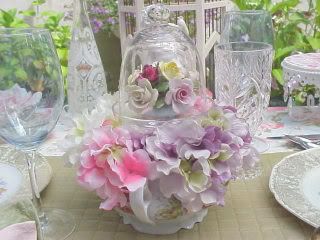
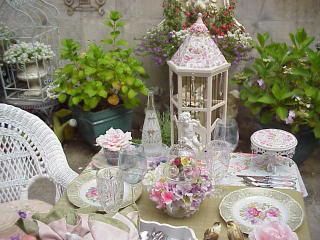
This is very simple and has a great impact. Truth be told, I threw this together in 5 minutes. It is very easy and you can use whatever you have available.Here are a couple of photos of the original that I used in my tablescape...


First, you need to gather the items you will need.

Any bowl, pot, or container will do, as long as the base of the pedestal fits and sit well in it. You can also use a platter, tray, or plate.


A glass covered dessert pedestal (the base need not be glass)

The vintage Adderley Rose Posy (you can put anything under the glass as long as it will fit and doesn't look smushed!)

For this project, I'm using faux roses.

I almost forgot, I use tissue to give the dessert pedestal a level surface. It's easy to adjust. You can also use styrofoam if you need to raise the pedestal a bit.

Insert the pedestal into the base

Voila! Your centerpiece is done!


Birdseye view


This is very simple and your options are unlimited!


I used this smaller arrangement on my tablescape because my space was limited. This can be as large or as small as you need. I have done a large one for the center and two complimenting smaller ones for each side of the table. It doesn't necessarily have to be for a centerpiece for a table, you can place it anywhere for a decorative and interesting touch.
You are only limited by what will fit between the container and the pedestal.
Instead of a dessert pedestal, you can use a candleholder or pillar; as long as it will fit into your base. If it isn't high enough, use styrofoam to raise it.
If you have any questions or have other suggestions, please feel free to leave a comment to share.
Hugs,


3 comments:
Oh Tina! This is so beautiful, and I thank you for the directions. It is just precious. I would have never put all of that together on my own. I probably would have gone the hard way. Thank you for sharing this beautiful work of art. Have a beautiful day. Stop by and say hi, as I love it when you do. Country Hugs, Sherry
My what lovely pieces you have. I love your post.
Nice of you to stop my my place as well.
How clever and pretty! Thank you for the directions :)
Post a Comment